What this is all about
Something that I wanted to do as part of this newsletter was to share a bit of the process behind some of the shaders I've made.
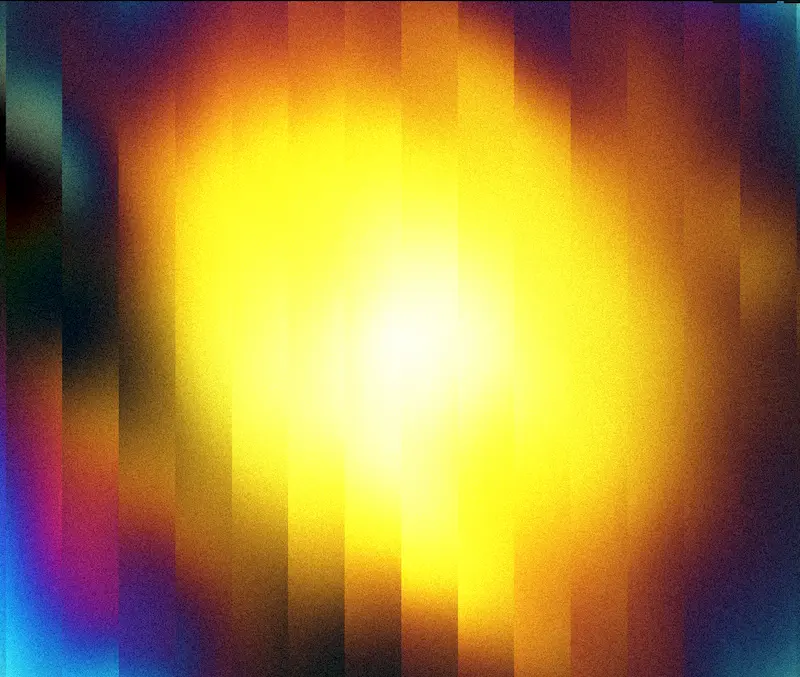
This breakdown is for one of my favourite shaders written for the Dawn series - which is a tribute to some of the iconic gradient shaders from Rik Oostenbroek.
Inspiration
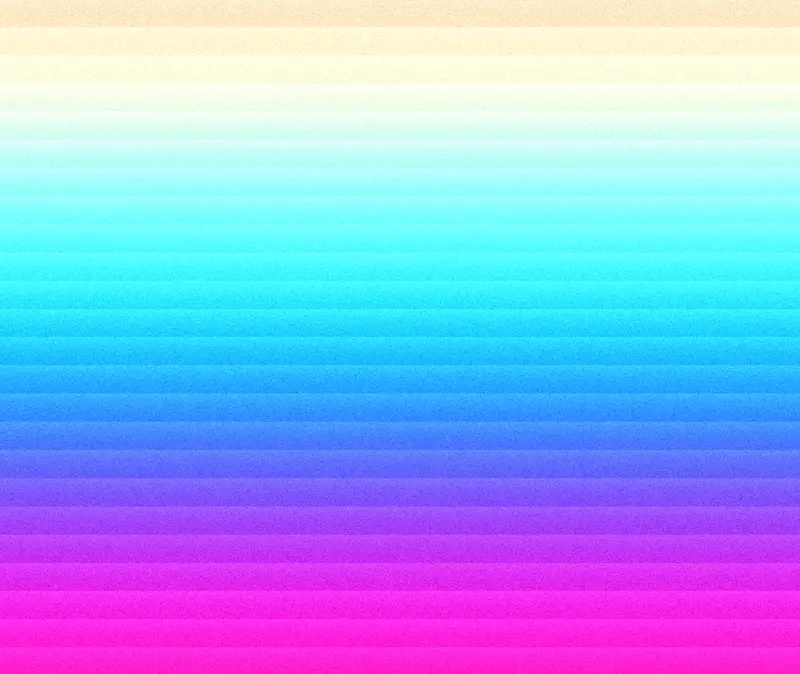
I've been a huge fan of his work for a long time, and was particularly inspired by some of his pieces that feature lovely, vertically-oriented gradients with a linear pattern and a grainy texture. Here are two of my favourites he posted on X:
Breakdown
This shader is surprisingly simple, but gives such an excellent result. It's a mixture of procedural color palettes, a fractionated pattern, and a grainy texture effect applied at the end, almost like a post-processing effect. To start with, here's the full shader:
import { Fn, time, screenSize, vec3, fract, pow } from 'three/tsl'
import { grainTextureEffect } from '@/tsl/post_processing/grain_texture_effect'
import { screenAspectUV } from '@/tsl/utils/function'
import { cosinePalette } from '@/tsl/utils/color/cosine_palette'

const dawn2 = Fn(() => {
  const _uv = screenAspectUV(screenSize).toVar()
  const uv0 = screenAspectUV(screenSize).toVar()

  const finalColor = vec3(0.0).toVar()

  const a = vec3(0.5, 0.5, 0.5)
  const b = vec3(0.5, 0.5, 0.5)
  const c = vec3(1.0, 0.7, 0.4)
  const d = vec3(0.0, 0.15, 0.2)
  const col = cosinePalette(_uv.y.sub(time.mul(0.1)), a, b, c, d)

  const s = fract(_uv.y.mul(24)).mul(0.3)

  finalColor.assign(col.add(pow(s, 2.0)))

  const _grain = grainTextureEffect(uv0).mul(0.2)
  finalColor.addAssign(_grain)

  return finalColor
})
I'm using some of the utilities that you'll find in Fragments:
grain- a function to generate a grainy texturescreenAspectUV- a function to get the aspect-corrected UVs for the screen in the range -0.5 to 0.5cosinePalette- a function to generate a cosine palette of colors derived from Inigo Quilez
Creating the gradient
The gradient here uses our cosinePalette function, which is a simple way to create a gradient of colors using a cosine function. I use this function a lot in my own work, and it's a great way to create a smooth, continuous gradient of colors.
// Palette arguments
const a = vec3(0.5, 0.5, 0.5)
const b = vec3(0.5, 0.5, 0.5)
const c = vec3(1.0, 0.7, 0.4)
const d = vec3(0.0, 0.15, 0.2)

// Create an animated vertically-oriented gradient using our UV coordinates
const col = cosinePalette(_uv.y.sub(time.mul(0.1)), a, b, c, d)
A simple repeating pattern
The linear pattern here is a simple, repeating pattern using the fract function. We then "soften" this pattern before applying it to the final shader by multiplying it by a small number.
// This pattern is based on _uv.y which essentially creates a vertical range from -0.5 to 0.5.
// We multiply this by some scalar (in this case 24) which will "zoom out" the coordinate space. This gives us a range of -12 to 12
// Then we use fract to only take the fractional part of the range (so we'll end up with -0.5 to 0.5 repeated 24 times
const s = fract(_uv.y.mul(24)).mul(0.3)
Adding Texture
We then use the grain function to add a grainy texture to the image. This is a simple function that creates noise and then applies it to the image.
// Add grain for texture
const _grain = grainTextureEffect(uv0).mul(0.2)
finalColor.addAssign(_grain)
Punching up the output
Here, we use the pow function to add a bit of added contrast to the pattern. We want to try and make the bright parts brighter, and the dark parts darker here. It's not much, but it's enough to make the image more interesting.
// The pow function squares the pattern value (s^2), which makes the bright parts brighter
// while keeping dark parts dark, creating more contrast and "punch"
finalColor.assign(col.add(pow(s, 2.0)))
Variations
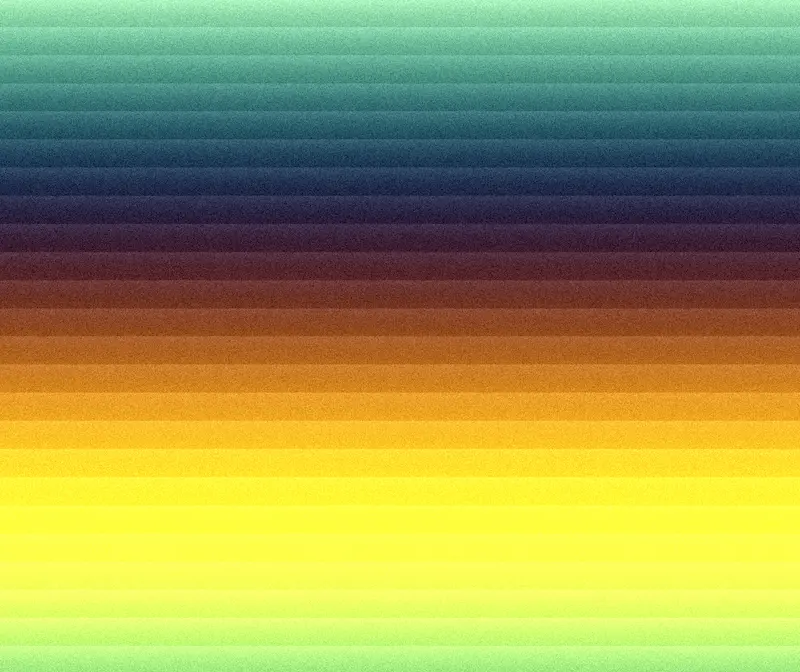
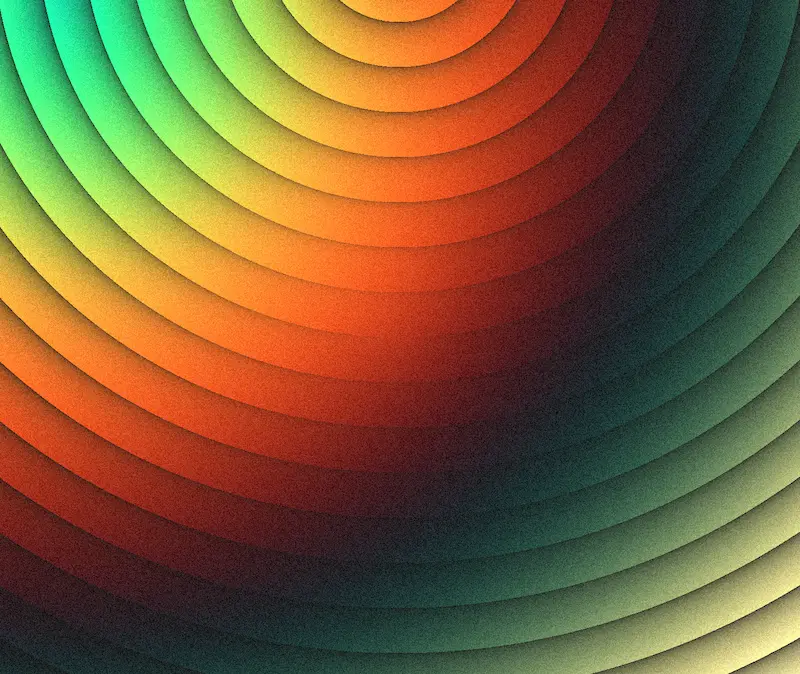
This technique is perfect for creating a variety of different looks and variations. Some examples here include some experimentation with:
- Changing the color palette range for a completely different look
- Using a different shape for the pattern, such as a circle
- Using layered noise for the gradient
As things get closer and closer to launch, I'll send out some more frequent updates on things, but it's all looking good! I've finished the first draft of the landing page, so that will be coming soon!