Breaking down Bands
I wanted to share the process behind one of my favorite shader series — Bands. These pieces show how stacking simple techniques creates something complex and beautiful.
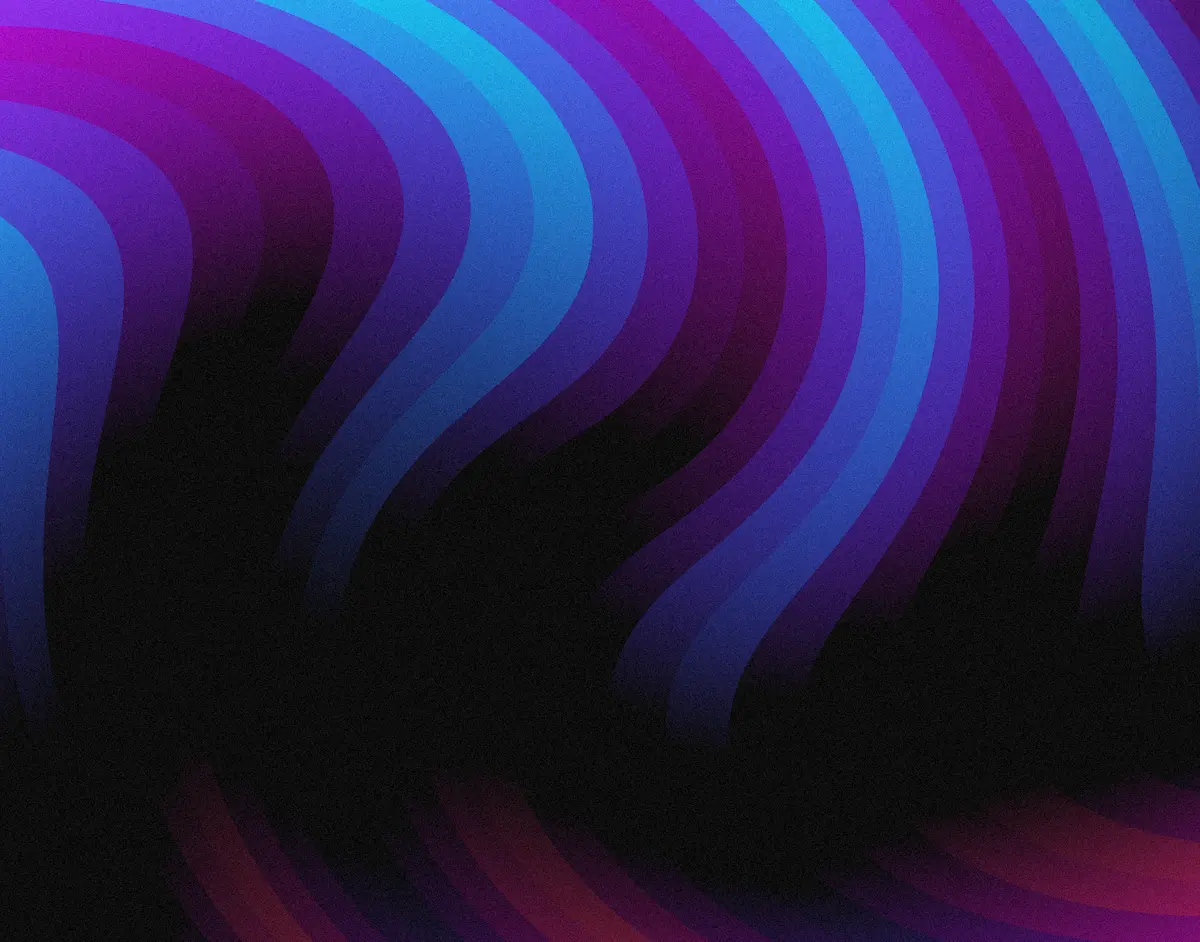
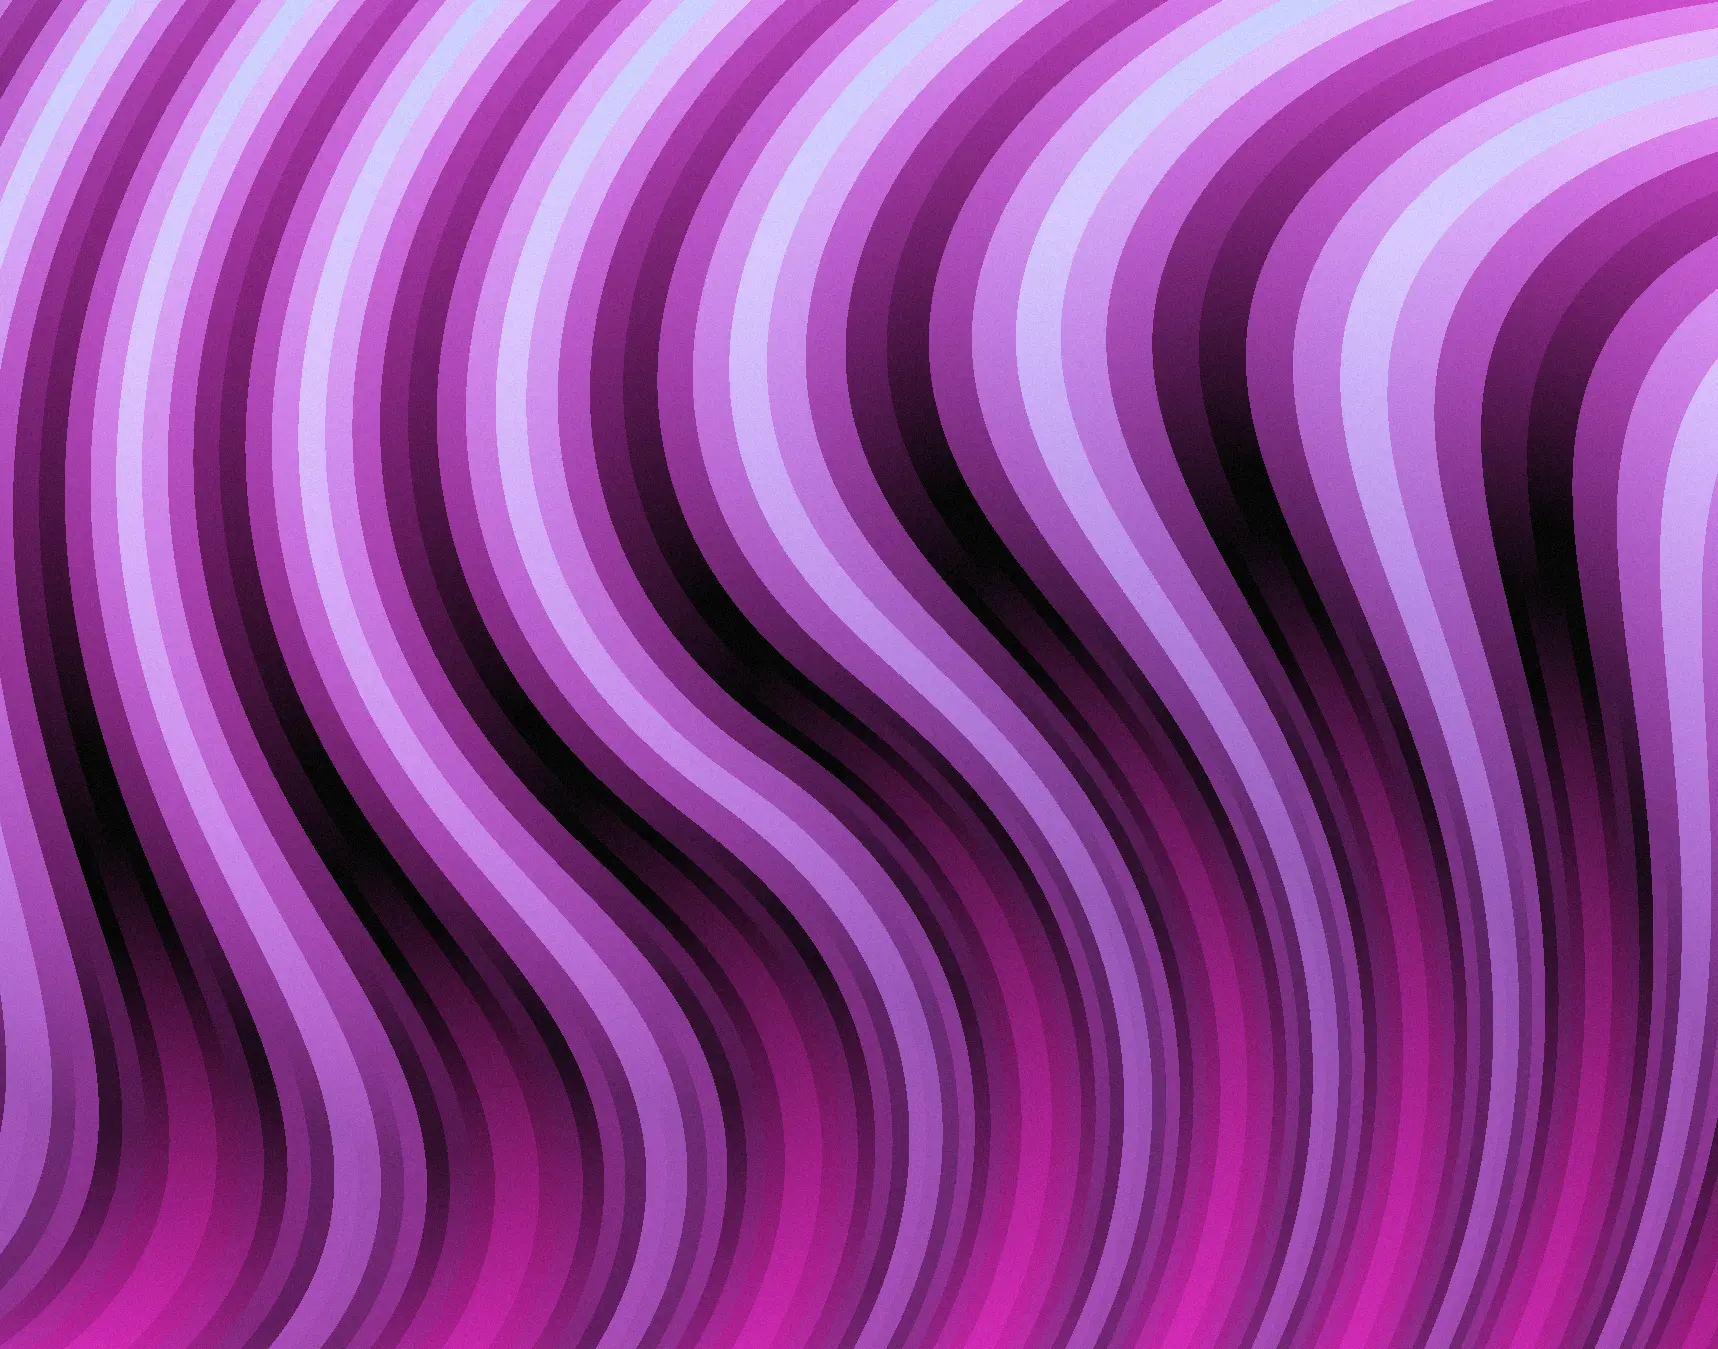
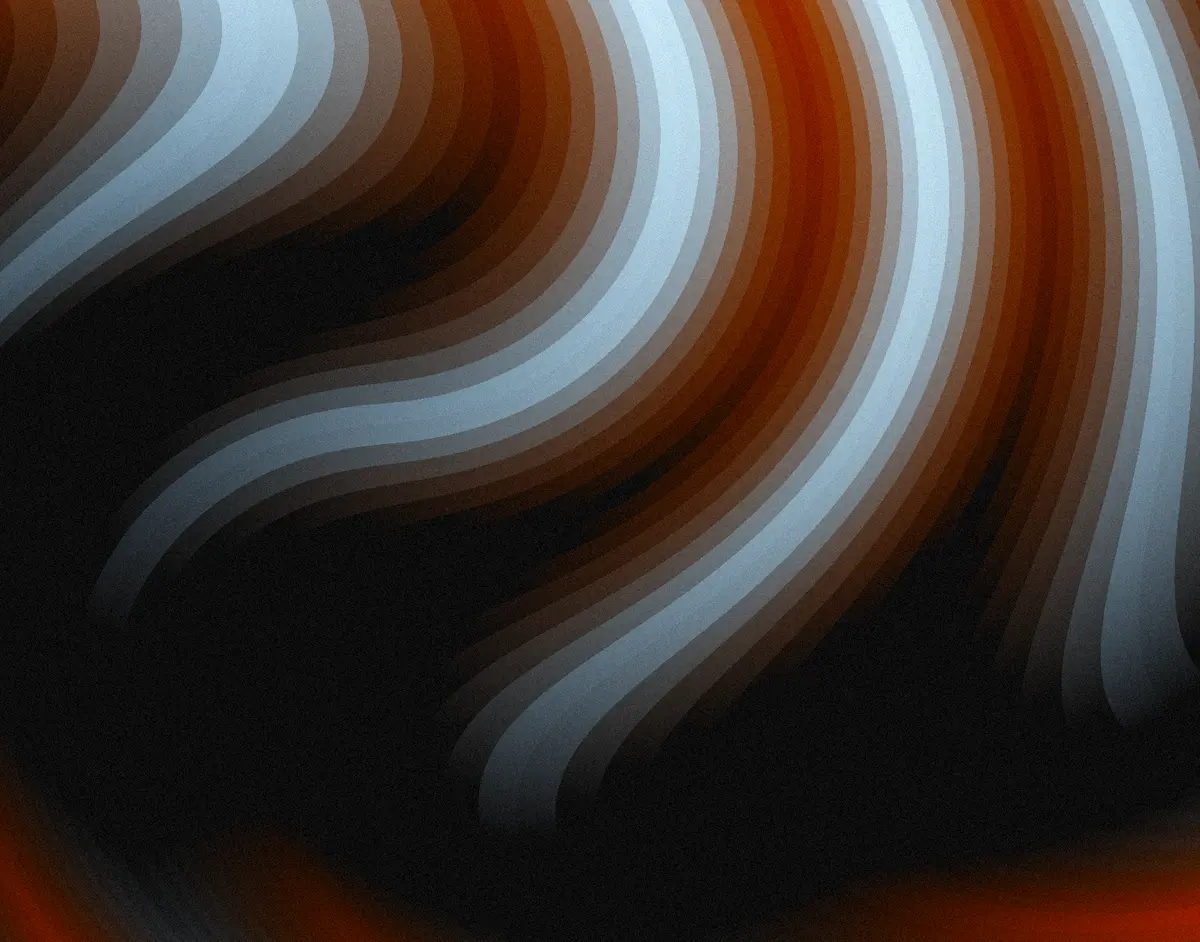
This breakdown covers Bands 1, which combines swirl distortion, quantized bands, triangle wave animation, and dual-layer color masking into a single flowing pattern.
Why this technique works
The magic here is in the layering. Each component does one thing well, and together they create something that feels organic even though it's built from math.
The Bands series was originally inspired by this post on X.
There was something intriguing about the saw shape combined with the stacked gradient that really appealed to me. I started by trying to recreate it in a shader.
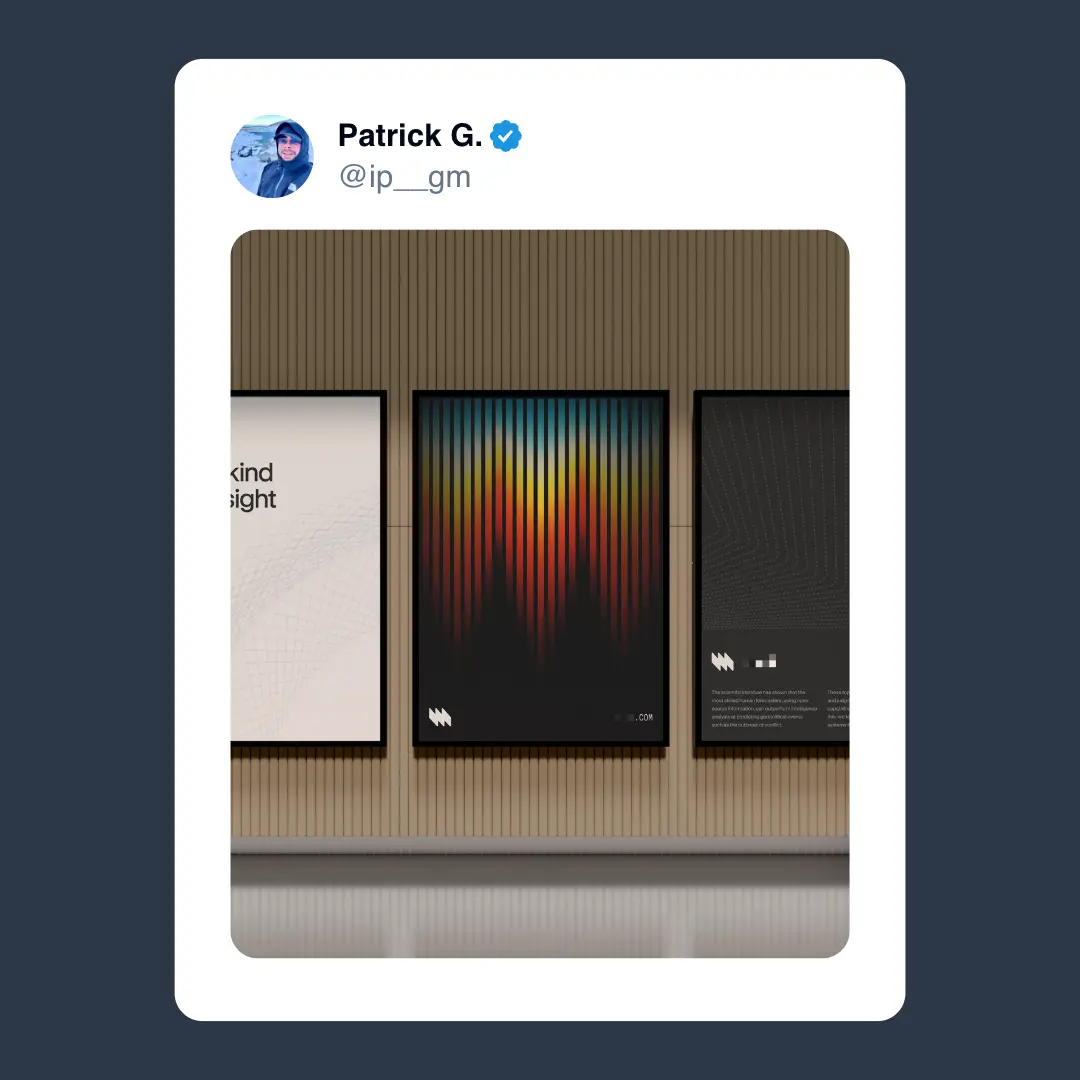
Another regular inspiration came from this post by Alex Cristache on X.
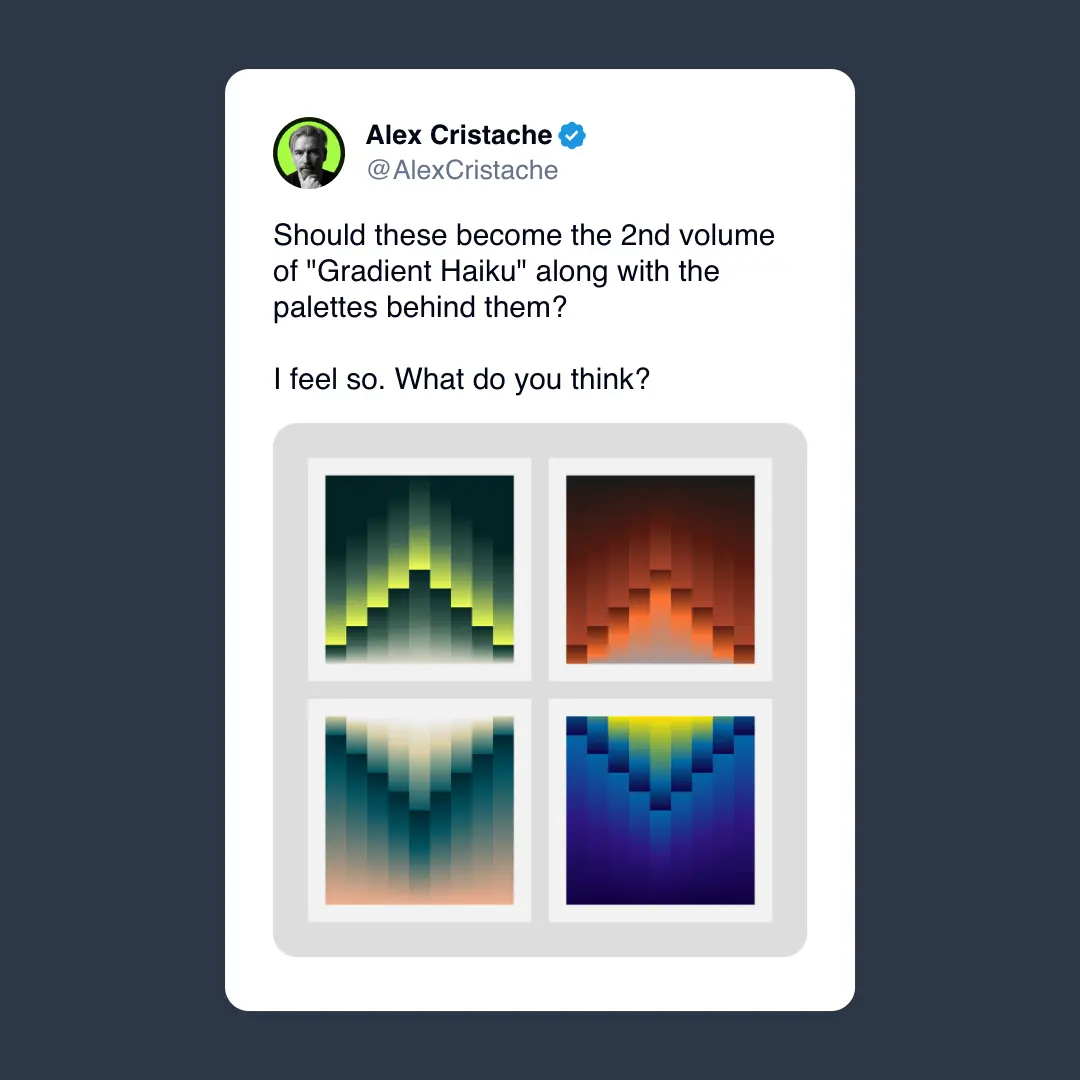
I love how striking that 3D geometry-style effect is - that sealed the deal for me.
I wanted to create a similar effect — or at least riff on those ideas — then take it in a different, more flowing, organic direction.
The Implementation
Here's the full implementation of Bands 1, but we'll go deeper into all of the components below.
The six components
This shader has six key parts working together:
- Swirl distortion warps the coordinate space
- Band quantization creates evenly spaced vertical bands
- Triangle wave animation adds smooth movement
- Color palette generation with Cosine Palette provides rich colors
- Dual-layer color masking creates vertical gradients
- Pseudo post-processing adds polish with tonemapping and grain
Let's break each one down.
Swirl distortion
We start by applying swirl distortion to the UV coordinates before creating the banded patterns. This warps the coordinate space, adding organic movement to what would otherwise be rigid geometric bands.
// Apply swirl distortion to create a dynamic warping effect
uv0.assign(swirlDistortion(uv0, { strength: swirlStrength, radius: swirlRadius, center: swirlCenter }))
The distortion happens before band quantization, so the bands themselves get twisted and curved by the swirl effect.
Changing the strength, radius, and center point of the distortion gives you a lot of control over the look and feel of the sketch. Playing with the center can create compelling asymmetry.
Band quantization
The core banding system uses phase quantization to create evenly spaced vertical bands:
// Phase for repeating pattern - multiply horizontal UV by frequency
const phase = uv0.x.mul(phaseFrequency)

// Quantize the phase into discrete bands
const band = floor(phase.mul(bandCount)).div(bandCount)

// Create a second set of bands offset by 0.5 for interleaved pattern
const band2 = floor(phase.add(0.5).mul(bandCount)).div(bandCount)
phaseFrequency controls how many cycles appear across the screen, while bandCount sets how many divisions each cycle splits into. The floor function creates sharp boundaries between bands.
The second band set is offset by 0.5 to create an interleaved pattern that adds visual complexity.
Triangle wave animation
Each band animates using triangle waves for smooth, flowing movement:
// Generate a triangle wave from the quantized band
const triangleWave = abs(
  fract(band.add(time.mul(animationSpeed)))
    .mul(2)
    .sub(1),
)

// Remap the triangle wave to a more useful range for color modulation
const remappedWave = remap(triangleWave, 0, 1, waveRemapMin, waveRemapMax)
The fract function creates a repeating sawtooth pattern, then abs(x * 2 - 1) folds it into a triangle wave. We remap it from [0,1] to a tighter range (default [0.2, 0.7]) for better color control.
A second triangle wave uses the offset band to add more animation layers. We're using fract here to handle the repeating pattern — something I break down in more detail in the Domain Repetition technique.
Color palette generation
The base color comes from a cosine palette, modulated by both vertical position and the animated triangle wave:
// Create the base color from cosine palette
const z = aspectUV.y.mul(paletteVerticalScale).add(modulationScalar.mul(remappedWave.mul(paletteWaveScale)))
const baseColor = cosinePalette(z, paletteA, paletteB, paletteC, paletteD)
This creates colors that shift vertically and horizontally as the bands animate. paletteVerticalScale controls the vertical contribution, while paletteWaveScale determines how much the triangle wave affects the palette lookup.
Dual-layer color masking
Two vertical gradient masks modulate the base palette color. The palette is created using a Cosine Palette, a staple of the Procedural Color Palettes Technique.
// Create first color mask from top
const topMask = vec3(uv0.y.sub(topMaskOffset).add(modulationScalar.mul(remappedWave.mul(topMaskWaveScale)))).toVar()

// Create second color mask from bottom
const bottomMask = vec3(
  oneMinus(uv0.y)
    .sub(bottomMaskOffset)
    .add(modulationScalar.mul(remappedWaveOffset.mul(bottomMaskWaveScale))),
).toVar()

// Clamp masks to valid color range
topMask.assign(clamp(topMask, 0, 1))
bottomMask.assign(clamp(bottomMask, 0, 1))

// Combine base color with both masks additively
const colCombined = baseColor.mul(topMask.add(bottomMask))
topMask creates a gradient from the top, offset and animated by the primary triangle wave. bottomMask does the same from the bottom using inverted UV coordinates and the offset triangle wave to add pleasing asymmetry.
After clamping, both masks combine additively to create complex vertical gradients that respond to the band animation.
Pseudo post-processing
Finally, we apply tonemapping and grain texture — a staple in all of my shaders now:
// Apply tanh tonemapping for smoother color transitions
finalColor.assign(tanh(finalColor.mul(tonemapMultiplier)))

// Add grain texture for organic, film-like quality
const g = grainTexturePattern(aspectUV).mul(grainAmount)
finalColor.addAssign(g)
The tanh function provides smooth tonemapping, preventing oversaturation while preserving color richness. Grain texture adds subtle noise for a more organic, film-like quality.
Variations
This technique is perfect for creating variations — the variety you can achieve just by altering the parameters is staggering. You can experiment with:
- Different swirl strengths and radii for more or less distortion
- Changing band counts and phase frequencies
- Adjusting triangle wave speeds and remap ranges
- Tweaking color palette parameters for different moods
- Modifying mask offsets and scales for different gradient effects
The key takeaway is that layering simple techniques creates complex results. Start with distortion, add quantization, animate with waves, color with palettes, mask with gradients, and polish with post-processing.
Each component is straightforward on its own, but together they create something that feels alive and organic.
It's something I love about working with shaders — layering simple techniques and using many variables to tweak endlessly, creating incredible things.
Celebrating 6 Months of the Fragments Newsletter
Today marks the 6-month anniversary of the Fragments newsletter. I'm so grateful that you've all decided to sign up and join me on this journey of learning and creating shaders.
Almost 140 creative coders, design engineers, and shader artists have joined Fragments since it launched — what an amazing community to be a part of.
If you'd like to unlock Fragments and get access to the full collection of 11 techniques, 36+ utilities, and over 120 shaders with full breakdowns, you can sign up here.